An Interactive Fiction Game for the TRS-80 & TRS-80 Color Computer
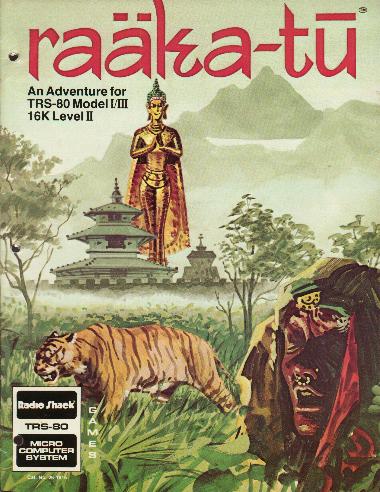

Your Ph.D. expedition to the Himalayas has taken a strange turn. An old woman appears at your camp in the early morning, eyes wide with terror: "Beware! Beware the temple of Raaka-Tu!" She tells of a god's temple deep in the jungle, filled with hideous monsters, loyal guards, and treasures beyond imagining. Then she vanishes into the undergrowth.
Armed with nothing but your wits, you set off alone into the impenetrable jungle — searching for the temple of the Khazhadim tribe, and the riches it holds. To win, you must navigate the temple, outwit its guardians, and escape alive with five treasures — earning a perfect score of 50 points.
| Publisher | Radio Shack / Tandy Corporation |
| Developer | Robert Arnstein |
| Year | 1981 (TRS-80) · 1982 (Color Computer) |
| Platform | TRS-80 Model I & III · TRS-80 Color Computer |
| Part number | 26-3311 · $14.95 |
You can play Raaka-Tu right here in your browser using a TRS-80 Color Computer emulator. Thanks to Chris Cantrell for the code that makes this possible.
Click on the green console and start typing.
| PC Key | CoCo Key | Function |
|---|---|---|
| left-arrow | shift-left-arrow | Move cursor left |
| right-arrow | shift-right-arrow | Move cursor right |
| delete | right-arrow | Delete char right |
| backspace | left-arrow | Delete char left |
| escape | clear | Delete the line |
You can also play Raaka-Tu in a web browser using the CoCo emulator Mocha: haplessgenius.com/mocha. Type CLOADM at the CoCo prompt, wait for the game to load, then type EXEC to begin.